- Opening and new products by Normunds Rustanovičs, MikroTik
- Wireless tricks workshop by Uldis Čerņevskis, MikroTik
- Load balancing Workshop, by Jānis Meģis, MikroTik
- OSPF on Wireless - with a twist by Ron Touw (Nest Wireless, UK) and Leo De Geer (Satellithuset, Sweden)
- RADIUS - make life easier by Daniel Starnowski (dasiu.pl, Poland)
- High availability network services using MikroTik RouterOS by Martin Pina (hanacke.net, Czech Republic)
- MikroTik RouterOS as a PIM router by Piotr Cogiel (Inter Projekt, Poland)
- Access Point Redundancy, Part 2 by Lorenzo Busatti (Grifonline S.r.l., Italy)
- Why our link performance is not Good? by Ahmad Mortazavi (Deltalink Electronics Ltd., Turkey)
- Web skins, What are they and how the use them? by Paweł Ciepliński (Poland)
Showing posts with label Tutorial dasar Mikrotik. Show all posts
Showing posts with label Tutorial dasar Mikrotik. Show all posts
Tuesday, March 20, 2012
Pesentation Material of Mikrotik User Meeting in Poland 2012

Friday, January 20, 2012
Mikrotik ECMP + LAB
 |
| Mikrotik ECMP Failover |
MikroTik ECMP
Buatlah topologi yang terdiri atas 3 router seperti diatas, R1 terhubung ke internet ISP 1, R2 terhubung ke ISP 2, sedangkan R3 akan kita fungsikan sebagai load balancing fail over menggunakan ECMP
a.
Konfigurasi R1 sebagai NAT
Koneksikan wlan1 dengan AP dari ISP 1, sampai mendapatkan IP address
Setting IP Address ether1:
/ ip address add address=13.13.13.1/24
network=13.13.13.0 broadcast=13.13.13.255 interface=ether1
Setting
NAT :
/ ip firewall nat add chain=srcnat out-interface=wlan1 action=masquerade
b.
Konfigurasi R2 sebagai NAT
Koneksikan wlan1 dengan AP dari
ISP 2, sampai mendapatkan IP address
Setting IP Address ether1:
/ ip address add address=23.23.23.2/24
network=13.13.13.0 broadcast=23.23.23.255 interface=ether1
Setting
NAT :
/ ip firewall nat add chain=srcnat out-interface=wlan1 action=masquerade
c.
Konfigurasi R3 sebagai ECMP
Setting IP Address ether1 dan
ether2
/ ip address
add address=13.13.13.3/24
network=13.13.13.0 broadcast=13.13.13.255 interface=ether1
add address=23.23.23.3/24
network=13.13.13.0 broadcast=23.23.23.255 interface=ether2
Setting NAT R3:
/ ip firewall nat
add chain=srcnat out-interface=wlan1
action=masquerade
add chain=srcnat out-interface=wlan2
action=masquerade
Setting Routing ECMP pada R3:
/ ip route
add dst-address=0.0.0.0/0 gateway=13.13.13.1
check-gateway=ping
add dst-address=0.0.0.0/0 gateway=23.23.23.2
check-gateway=ping
Check-Gateway
Anda dapat mengatur router untuk
memeriksa reachability gateway menggunakan option check-gateway, bisa melalui
protocol ping (icmp) atau ARP. Check-gateway memungkinkan router untuk
melakukan check ping (icmp) ke IP gateway setiap interfal waktu 10 detik,
apabila 2 kali ping (2 x1 0 = 20 detik)
gateway tidak ada respon otomatis table route gateway tersebut akan didisable
(inactive).
Jika pilihan check-gateway ini
diaktifkan pada satu rute maka akan mempengaruhi semua rute yang berkaitan
dengan gateway tersebut.
Setting
Routing ECMP juga dapat dibuat dalam satu line route:
/ ip route
add dst-address=0.0.0.0/0 gateway=13.13.13.1,23.23.23.2
check-gateway=ping

Apabila ECMP dibuat dalam 1 line, kita kesulitan dalam hal pengaturan
distance, scope dan routing mark untuk masing-masing gateway.
a.
Check koneksi
Cobalah
ping dan tracert ke IP luar internet, misalkan ke google IP 8.8.8.8
Putuskan
koneksi salah satu gateway dengan cara disable interface pada R2 atau R1, dan
cobalah trace kembali


untuk tutorial selengkapnya download disini
Tuesday, October 25, 2011
MTCNA Training Module
Training MikroTik MTCNA ( MikroTik Certified Network Associate ) adalah untuk mengambil sertfifikasi dasar Mikrotik, program training yang bertujuan memberitahukan pengetahuan tentang apa itu dasar - dasar MikroTik dan akan lebih banyak membahas tentang fungsi - fungsi dasar MikroTik dan fitur – fitur MikroTik RouterOS. Program ini ditujukan bagi mereka yang berniat mempelajari mikrotik dari level paling dasar.
Topik Bahasan
.: Introduction to RouterOS
.: Basic Configuration mikrotik
.: Wireless configuration and WDS
.: Firewall Filters, NAT, Mangle
.: Tunnels and VPN, PPPoE, PPTP, EoIP
.: HotSpot
.: QoS and Simple Queues, Burts concept
.: Torch, Sniffer
.: p2p Traffic Identification
.: Bridge , STP , RSTP
.: DHCP server/client/relay
.: Simple Routing
Download Modul
Topik Bahasan
.: Introduction to RouterOS
.: Basic Configuration mikrotik
.: Wireless configuration and WDS
.: Firewall Filters, NAT, Mangle
.: Tunnels and VPN, PPPoE, PPTP, EoIP
.: HotSpot
.: QoS and Simple Queues, Burts concept
.: Torch, Sniffer
.: p2p Traffic Identification
.: Bridge , STP , RSTP
.: DHCP server/client/relay
.: Simple Routing
Download Modul
Thursday, June 2, 2011
Materi Presentasi Mikrotik User Meeting, April 2011 di Jakarta

Berikut adalah materi presentasi Mikrotik User Meeting di Jakarta, tanggal 9-10 April 2011:
- Wireless Mesh With HWMP+ and SMS Early Warning by Gatot Hamiseno (MikroLine, Indonesia)
- NEW User Manager by Doni Kuswaryadi (Forum Mikrotik Indonesia)
- Intrusion Detection System by Erfin Susanto (PT. Dutakom Wibawa Putra, Indonesia)
- Centralized Hotspot Control by Herry Darmawan (PT. Dutakom Wibawa Putra, Indonesia)
- Dual-OSPF pada Koneksi Wireless by Muhti Subiyantoro (PT. Dutakom Wibawa Putra, Indonesia)
- Using netwatch tool by Harry Yuliansyah (Indonesia)
- Reaching 200mbit speed with RouterBOARD SXT by F. Robby Tarudji (Digital Cipta Solusindo)
- Advanced Dude Monitoring by Slamet Suharko (PT. Dutakom Wibawa Putra, Indonesia)
- HTB vs PCQ by Valens Riyadi (Citraweb, Indonesia)
Saturday, December 11, 2010
Tutorial The Dude, Free Application by MikroTik
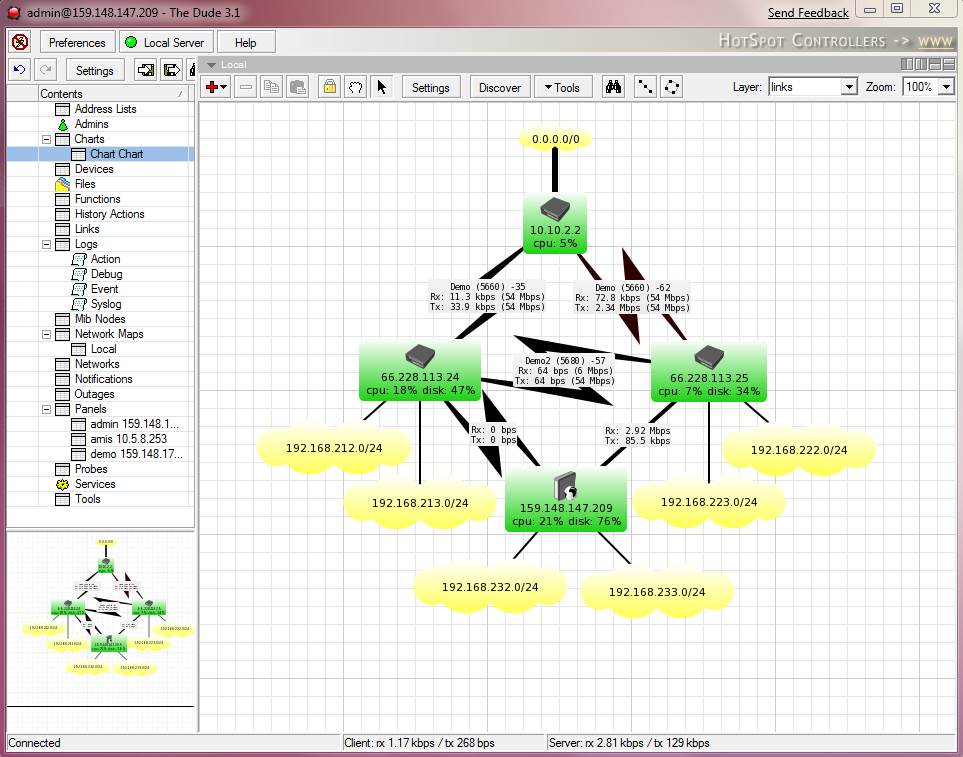
Download The Dude
Download Completed Tutorial
Mikrotik User Meeting in Salvador, Bahia, Brazil, 2010


PresentationsMaterial
Day 1- Implementações de IPV6 com Mikrotik RouterOS. IPV6 Firewall e OSPFV-3 by Wardner Maia (MD Brasil, Brazil)
- Como o RouterOs mudou a rede e dia a dia dos ISP/WISP no Brasil by Magdiel Da Costa Santos, (FS Internet, Brazil)
- Boas práticas com Firewall MikroTik by Jorge Fernando (Aloo Telecom, Brazil)
- Evitando Interferências e otimizando células multiponto em um AP rodando RouterOS by Luciano Franz (Brazil)
- Transmissão sem Interferncia com Mikrotik Router OS by Nicola Sanchez (Microwave, Brazil)
- Tuneis PPPoE em Provedores de Internet by Humberto Filho (HiperNET, Brazil)
- Implementing MPLS on Mikrotik Router OS by Edson X Veloso Júnior, (MD Brazil, Brazil)
- RouterOS + SwOS: 100% mikrotik based networks by Antonio Junior (G3 Telecom, Brazil)
- Redes com Alta Disponibilidade by Lacier da Costa Dias Junior (Brazil)
- Hotspot - Autenticao Centralizada - Pagamento via PAYPAL by Juliano Hara (FS Internet, Brasil)
- Passive Optical Networks (PoN) com Mikrotik RouterOS by Nicola Sanchez (Microwave, Brazil)
- GI-cert Para RouterOS by Squitter (USA-Brazil)
- VLAN with Mikrotik by Flávio G. F. Camacho (Vipnet, Brazil)
- MONTANDO ESTRUTURAS DE QOS COM HTB UTILIZANDO O ROUTER-OS - O CONCEITO by David Marcony (CATVBRASIL, Brazil)
- Mesh Networks - Provedores e Projeto Cidade Digital by Jonni Pianezzer (Tecnico em Wireless, Brazil)
- BGP no Mikrotik RouterOS - Estudo de cenários práticos em Autonomous Systems brasileiros by Wardner Maia (MD Brasil, Brazil)
- Transporte em camada 2:Um estudo de caso by Rinaldo Vaz (ANID, Brazil)
- Micro-setorização o futuro dos provedores wireless by Anderson Marin Matozinhos (Brumanet Ltda, Brazil)
- Projeto Rede Wan-Wireless de Anápolis - Custo Benefício da Implantação - Case de sucesso by Mario Moreira (Prefeitura de Anápolis, Brazil)
source: www.mum.mikrotik.com
Wednesday, December 1, 2010
MikroTik User Meeting in CHINA, April 2010
The first time MikroTik User Meeting in CHINA (GuangZhou, Canton), April 10, 2010.


Purpose of the Meeting
MikroTik Router operating system and software offer a new and exciting alternative to traditional brand name router solutions. This will be a meeting that will present strategies for deploying new and innovative MikroTik RouterOS and RouterBoard hardware applications.
Dates of Events
Training before the MUM is a separate event, MUM registration price does not include Training! Training is not organized by MikroTik, but by EDCWifi. Training takes place from April 6-9 (4 days). More info on EDCwifi site.
What Attendees Learn About
Where and how MikroTik RouterOS is being used, New plans for enterprise routing applications, Innovative ideas and strategies, New opportunities for MikroTik products and services.
Presentation Materials


Purpose of the Meeting
MikroTik Router operating system and software offer a new and exciting alternative to traditional brand name router solutions. This will be a meeting that will present strategies for deploying new and innovative MikroTik RouterOS and RouterBoard hardware applications.
Dates of Events
Training before the MUM is a separate event, MUM registration price does not include Training! Training is not organized by MikroTik, but by EDCWifi. Training takes place from April 6-9 (4 days). More info on EDCwifi site.
What Attendees Learn About
Where and how MikroTik RouterOS is being used, New plans for enterprise routing applications, Innovative ideas and strategies, New opportunities for MikroTik products and services.
Presentation Materials
- Wireless Installation Tips and Workshop by Andrew Zheng (EDCwifi, China)
- Bandwidth Management by Site by Harijanto Pribadi (PT. Data Utama Dinamika, Indonesia)
- Case Study by Yu Song (CDnat, China)
- RouterBOARD Application at Junior High School computer LAB by Luo Jiahua (China)
- Nine Wireless Hacks by Jesse Liu (Convergingstream Technologies Inc., China)
Thursday, November 25, 2010
Mikrotik Load Balancing over Multiple Gateways

The typical situation where you got one router and want to connect to two ISPs. Of course, you want to do load balancing! There are several ways how to do it. Depending on the particular situation, you may find one best suited for you.
Policy Routing based on Client IP Address
If you have a number of hosts, you may group them by IP addresses. Then, depending on the source IP address, send the traffic out through Gateway #1 or #2. This is not really the best approach, giving you perfect load balancing, but it's easy to implement, and gives you some control too.
Mikrotik Winbox Tutorial
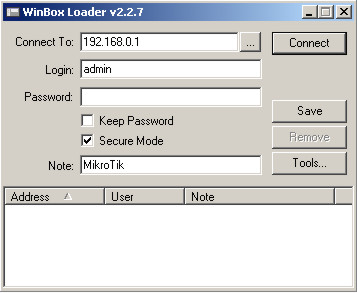
All Winbox interface functions are as close as possible to Console functions, that is why there are no Winbox sections in the manual.
Some of advanced and system critical configurations are not possible from winbox, like MAC address change on an interface.
Winbox loader can be downloaded directly from the router.
Open your browser and enter router's IP address, RouterOS welcome page will be displayed. Click on the link to download winbox.exe
Mikrotik Making a Simple Wireless AP
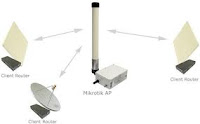
Requirements:
* a router running RouterOS loaded with supported miniPCI wireless cards
* a connection to the router via the Winbox utility
Instructions:
Start by opening the Wireless Interface window in Winbox. You will see some wireless cards listed here, they might be disabled - to turn them on, click on the blue Enable button. Make sure that the interface is configured and the antennas are connected before you enable an interface.
Sunday, November 7, 2010
Mikrotik Issues (No. 21 - 28)

Issue No. 28, October 19, 2010
- low cost CPE devices
- a new RouterBOARD product
- MikroTik event updates
- new Nv2 features
- CPU load monitoring tool
Issue No. 27, August 10, 2010
- RouterBOARD 711
- Training classes in USA before MUM
- MUM in Brazil, Colombia and USA
- Nv2 TDMA protocol
- Multicore improvements
Issue No. 26, July 09, 2010
- The Dude 4
- MUM USA
- MikroTik used in Oil Spill cleanup
- New secure tunnel - SSTP
- Mulicore support extended
Issue No. 25, April 29, 2010
- RB411AR-M
- R52n-M
- RB1100 availability
- New Dude and RouterOS features
- MUM update
Special Issue, March 15, 2010
- MUM news
- Video news
- New products
- New RouterOS
- New SwOS
Issue No. 22, November 30, 2009
- new product RB750G
- new product RB800
- MUM information
- Spectrum tool
- Tips and tricks
- BFD support
- Special RouterOS v4 release edition
Monday, May 10, 2010
Tutotial Mikrotik ( e-book) part I
 This Tutorial contents:
1. How to limit traffic download RapidShare
2. Implementasi Penggunaan PCQ Bagi ISP Untuk Mendapatkan Hasil Yang Maksimal
3. Detect dan shapping download dengan connetion byte
4. Memisahkan Gateway Internasonal dan IIX dengan 3 NIC (Bagian 2)
5. Bandwidth management di Hotspot Area
6. Memisahkan IIX ke ISP wireless dan Internasional ke speedy
7. How To Block Traceroute
8. HOWTO: Menghindari Port Scanner dari Hacker
9. HOW TO : Melindungi Pelanggan/User Anda
10. Load-balancing & Fail-over di MikroTik
11. Redirect Mikrotik ke Komputer Proxy Squid (tanpa parent proxy MT)
12. Delaypool rasa Mikrotik
13. 2 Isp In 1 Router With Loadbalancing
14. Tutz Load Balancing Plus plus [Chaozz version] (Route Rule)
15. SETUP MIKROTIK (base 1)
16. TUTORIAL SETUP HOTSPOT + USERMANAGER
17. TUTORIAL 2 ISP IN 1 ROUTER WITH LOADBALANCING
18. SETUP QUEUE
19. TUTORIAL MISAHIN BW LOKAL DAN INTERNATIONAL
20. TUTORIAL SETING IP-PROXY & CONTOH PENGGUNANNYA (BASIC)
21. SETING PPTP SERVER & CLIENT
22. HOWTO: Menghindari Port Scanner dari Hacker
23. Wireless Bridge (client) dengan AP tanpa WDS
24. Setting Point To Multi Point
25. Pengamanan Mikrotik dari Scan Winbox dan Neighbour
26. Transparent Traffic Shaper
27. Pengamanan Mikrotik dari Scan Winbox dan Neighbour
28. Script Bikin Queues Tree B/W Limiter
29. Update Otomatis nice.rsc
30. [Share] Script u/ membatasi BW jika suatu traffic client melewati batas tertentu
31. Hotspot Mikrotik
32. [tutorial] Mikrotik Load Balancing - Winbox version
33. Konfigurasi SMS saat Internet down
34. Mikrotik dengan SquidBox
35.
36. Load Balance + Fail Over dengan script
37. Load Balancing nth buat Mikrotik Ver 3.xx dan 2.9xx
38. MikroTik Password Recovery
39. Howto : Bypass traceroute traffic
40. Cara copy torch atau LOG ke file ---caranya?
41. MikroTik Password Recovery
42. [Script] HTML Project for HotSpot Voucher
43. Ringtone Mikrotik
44. Editing Hotspot login Page
45. Memisahkan antara download dan browsing dengan mikrotik
46. backup database radius server hotspot
Tutotial Mikrotik ( e-book) part II

1. [How To] Blocked Page at Web Proxy MikroTik
2. Editing Hotspot login Page
3. misahin download dan browsing?
4. Tut FullSpeed dari cache internalnya mikrotik (untuk versin 2.9)
5. Yang Pengen Block FRIENDSTER
6. Another way to block web
7. NEW Update --> Setting PPPoE dan Load Balance Speedy --NEW UPDATE--
8. Cara setting Web proxy 3.20
9. NGE Limit Youtube Video Streaming di MT 3.xx
10. Script Limit Bandwidth berdasar Siang – Malam
11. Simple Load Balancing + DNS Resolver + Secret Fiture
12. Blok PTP – other way
13. Login HTTPS di Hotspot
14. mengatur prioritas trafik dari dan ke mikrotik
15. Banyak Web Server di belakang router Mikrotik
16. Routerboard 450 Repaired
17. Satu (1) Userman Banyak Hotspot
18. recovery password mikrotik
19. Cara buat PPPOE server
20. misahin download dan browsing?
21. Beberapa Konfigurasi Mikrotik dan Proxy
22. Queue dengan SRC-NAT dan WEB-PROXY
23. Mikrotik - menggunakan squid sebagai web proxy sehingga lebih optimal
24. Beda Limit Siang dan Malam secara otomatis
25. Script untuk block Conflicker Virus secara otomatis
26. VLAN di RB750 (Requested by bro Hakeem)
27. Contoh Implementasi PCQ
28. Setting Bridge dan dial PPPoE dari Mikrotik
29. The NEW LoadBalance!! More Powerfull -TESTED-
Download E-book
Thursday, December 10, 2009
Kumpulan E-book Mikrotik Bahasa Indonesia
Kumpulan E-Book Mikrotik bahasa Indonesia bisa dodownload di 4shared
Online Training - Mikrotik Security
This class video includes some best practices along with firewalling. This class is about 50 minutes long and you will be a genius and beloved by all by the end.
Slides can be found here: Mikrotik Security (44)
Explanation video can be found here: Video Tutorial
Slides can be found here: Mikrotik Security (44)
Explanation video can be found here: Video Tutorial
Online Training - Mikrotik Basics
This is a 45 minute video that will walk you through configuring a Mikrotik for a standard network: ip addressing, routing, dhcp server/client, DNS, basic wireless and bridging.
It also covers some of the basic services and tools.
The slides can be found here -> Mikrotik Basics (94).
For video training can be found here-> Video Tutorial
If you want to join our MikroTik MTCNA and MTCRE training & certification program, you can find the information at www.training-mikrotik.com
It also covers some of the basic services and tools.
The slides can be found here -> Mikrotik Basics (94).
For video training can be found here-> Video Tutorial
If you want to join our MikroTik MTCNA and MTCRE training & certification program, you can find the information at www.training-mikrotik.com
User Manager Mikrotik
User Manager Mikrotik merupakan management system yang apat dipergunakan untuk memanage user sbb:
- HotSpot users
- PPP (PPtP/PPPoE) users
- DHCP users
- Wireless users
- RouterOS users.
- Pada tulisan ini akan sedikit diulas mengenai User Manager untuk hotspot user. Sebelumnya paket hotspot dan dhcp server harus sudah terintall/enable dan dikonfigurasi terlebih dahulu pada Mikrotik RouterOS. Asumsi pada tulisan ini RouterOS terdiri atas 1 Wlan dan 1 ether. Ether sebagai interface yang terhubung ke internet sedangkan wlan sebagai interface yang terhubung ke hotspot client.Ip ether 1 192.168.0.40 dan wlan 1 dengan ip 172.16.0.1/24. Langkah-langkahnya sebagai berikut:
- 1. Set DHCP Server pada interface wlan1 ( Set Dhcp server ada pada tulisan terdahulu).
- 2. Set Hostpot
/ ip hotspot profile set hsprof1 use-radius=yes - 3. Set Radius Client untuk User Manager menangani hotspot
/ radius add service=hotspot address=172.16.0.1 secret=123456 - Sebagai catatan pertama kali hotspot user autentifikasi akan membaca pada database /ip hotspot user print. Remove data pada direktori ini agar autentifikasi pada radius.
4. Install User Manager
- Buka system packages dari winbox atau terminal
/system/packages/print
- Jika belum ada paket user manager install dulu. Karena User-manager merupakan paket terpisah dari router os MT. Pastikan versi outer OS sama dengan versi paket user manager. Misalnya jika router os kita 2.9.50 maka paket user-manager juga harus 2.9.50.
Download dari http://www.mikrotik.com/download.html, pilih salah paket user-manager-2.9.x.npk dari paket zip
- Upload via Program FTP Ke Mikrotik Server
- Reboot Mikrotik Server
- Cek system packages spt no 1, jika user manager belum aktif diaktifkan terlebih dahulu kemudian reboot. Jika sudah aktif
- buka http://192.168.0.40/userman
- Jika sudah bisa terbuka halaman login user manager, berarti user manager sudah aktif.
- 5. Buat Pada User Manager nama subcriber
/ tool user-manager customer add login="admin" password=123 permissions=owner - 6. Buat Hotspot Router
/ tool user-manager router add subscriber=admin ip-address=172.16.0.1 shared-secret=123456 - 7. Buat User untuk Hotspot
/ tool user-manager user add username=fajar password=123 subscriber=admin
source:http://fajar.uii.net.i
Tuesday, November 17, 2009
Internet Protocol version 6 (IPv6) in Mikrotik
Internet Protocol version 6 (IPv6) is the next-generation Internet Protocol version designated as the successor to IPv4, the first implementation used in the Internet and still in dominant use currently[update]. It is an Internet Layer protocol for packet-switched internetworks. The main driving force for the redesign of Internet Protocol was the foreseeable IPv4 address exhaustion. IPv6 was defined in December 1998 by the Internet Engineering Task Force (IETF) with the publication of an Internet standard specification, RFC 2460.
IPv6 has a vastly larger address space than IPv4. This results from the use of a 128-bit address, whereas IPv4 uses only 32 bits. The new address space thus supports 2128 (about 3.4×1038) addresses. This expansion provides flexibility in allocating addresses and routing traffic and eliminates the primary need for network address translation (NAT), which gained widespread deployment as an effort to alleviate IPv4 address exhaustion.
IPv6 also implements new features that simplify aspects of address assignment (stateless address autoconfiguration) and network renumbering (prefix and router announcements) when changing Internet connectivity providers. The IPv6 subnet size has been standardized by fixing the size of the host identifier portion of an address to 64 bits to facilitate an automatic mechanism for forming the host identifier from Link Layer media addressing information (MAC address).
Network security is integrated into the design of the IPv6 architecture. Internet Protocol Security (IPsec) was originally developed for IPv6, but found widespread optional deployment first in IPv4 (into which it was back-engineered). The IPv6 specifications mandate IPsec implementation as a fundamental interoperability requirement.
In December 2008, despite marking its 10th anniversary as a Standards Track protocol, IPv6 was only in its infancy in terms of general worldwide deployment. A 2008 study by Google Inc. indicated that penetration was still less than one percent of Internet-enabled hosts in any country. IPv6 has been implemented on all major operating systems in use in commercial, business, and home consumer environments.
Download Tutorial IPv6[ppt]
IPv6 has a vastly larger address space than IPv4. This results from the use of a 128-bit address, whereas IPv4 uses only 32 bits. The new address space thus supports 2128 (about 3.4×1038) addresses. This expansion provides flexibility in allocating addresses and routing traffic and eliminates the primary need for network address translation (NAT), which gained widespread deployment as an effort to alleviate IPv4 address exhaustion.
IPv6 also implements new features that simplify aspects of address assignment (stateless address autoconfiguration) and network renumbering (prefix and router announcements) when changing Internet connectivity providers. The IPv6 subnet size has been standardized by fixing the size of the host identifier portion of an address to 64 bits to facilitate an automatic mechanism for forming the host identifier from Link Layer media addressing information (MAC address).
Network security is integrated into the design of the IPv6 architecture. Internet Protocol Security (IPsec) was originally developed for IPv6, but found widespread optional deployment first in IPv4 (into which it was back-engineered). The IPv6 specifications mandate IPsec implementation as a fundamental interoperability requirement.
In December 2008, despite marking its 10th anniversary as a Standards Track protocol, IPv6 was only in its infancy in terms of general worldwide deployment. A 2008 study by Google Inc. indicated that penetration was still less than one percent of Internet-enabled hosts in any country. IPv6 has been implemented on all major operating systems in use in commercial, business, and home consumer environments.
Download Tutorial IPv6[ppt]
Sunday, November 1, 2009
Modul Pelatihan Dasar Mikrotik
Pendahuluan
Routing memegang peranan penting dalam suatu network terutama dalam mengatur jalur data dari satu komputer ke komputer lain. Komputer yang bertugas mengatur routing di sebut Router.
Materi pada modul ini berisi instalasi dan penggunaan Sistem Operasi MIKROTIK. Disini sengaja di pilih Sistem Operasi MIKROTIK karena di pandang mudah dalam pengoperasiannya dan kebutuhan hardware yang relatif rendah.
Kebutuhan hardware minimal :
Pentium II
RAM 64 Mb
Harddisk IDE 400 Mb
Untuk saat ini MIKROTIK hanya bisa di install di harddisk type IDE, sedang kan harddisk dengan type SCSI dan SATA belum bisa digunakan.
MIKROTIK mempunyai banyak service atau tool sehingga bisa dijadikan DHCP server, PROXY server, RADIUS server, DNS server, VPN server selain sebagai router.
Pada modul ini, akan di bahas MIKROTIK sebagai ROUTER dan sebagai BRIDGE. Disamping itu juga di bahas setting MIKROTIK sebagai pembagi bandwidth.
Download Modul pelatihan dasar MikroTik
Routing memegang peranan penting dalam suatu network terutama dalam mengatur jalur data dari satu komputer ke komputer lain. Komputer yang bertugas mengatur routing di sebut Router.
Materi pada modul ini berisi instalasi dan penggunaan Sistem Operasi MIKROTIK. Disini sengaja di pilih Sistem Operasi MIKROTIK karena di pandang mudah dalam pengoperasiannya dan kebutuhan hardware yang relatif rendah.
Kebutuhan hardware minimal :
Pentium II
RAM 64 Mb
Harddisk IDE 400 Mb
Untuk saat ini MIKROTIK hanya bisa di install di harddisk type IDE, sedang kan harddisk dengan type SCSI dan SATA belum bisa digunakan.
MIKROTIK mempunyai banyak service atau tool sehingga bisa dijadikan DHCP server, PROXY server, RADIUS server, DNS server, VPN server selain sebagai router.
Pada modul ini, akan di bahas MIKROTIK sebagai ROUTER dan sebagai BRIDGE. Disamping itu juga di bahas setting MIKROTIK sebagai pembagi bandwidth.
Download Modul pelatihan dasar MikroTik
Sunday, September 13, 2009
MikroTik RouterOS™ & License
E-book Contents:
1. About MikroTik RouterOS™
* What is MikroTik RouterOS?
* Can I test the RouterOS befor i buy it?
* Where can I buy the License Key?
* Can MikroTik connect to high speed service provider such as T1, T3 or other high speed connection?
* How fast is Microtik RouterOS?
* Can Mikrotik RouterOS do what Cisco router can?
* What Operating system is used to run Mikrotik RouterOS?
* Is RouterOS secure?
2. Logging on and Passwords
* What is the default username and password for RouterOS login?
* I forgot my password?
* After power failure the MikroTik router is not starting up again?
* How can I access router if LAN has been disabled?
3. Licensing Issues
* How many time can I use RouterOS licence?
* Does the license expire?
* How can I reinstall the MikroTik RouterOS™ software without losing my software license?
* Can I use my MikroTik RouterOS™ software license on a different hardware?
* What to do, if my hard drive with MikroTik RouterOS™ dies, and I have to install another one?
* How can I enter a new Software Key?
* I have mis-typed the software ID when I purchased the Software Key. How can I fix this?
4. Installation
* How large HDD can I use for the MikroTik RouterOS™?
* Can I run MikroTik RouterOS™ from any hard drive in my system?
* Why the CD installation stops at some point and does not go to the end?
5. Upgrading
* How can I install additional feature packages?
* How can I upgrade?
* I installed additional feature package, but the relevant interface does not show up under the /interface print list.
* If I do upgrade RouterOS, will I lose my configuration?
* How much free disk space do I need when upgrading to higher version?
6. Downgrading
* How can I downgrade the MikroTik RouterOS™ installation to an older version?
7. TCP/IP Related Questions
* I have two Network Interface Cards in the MikroTik router and they are working properly. I can ping both networks from the router but can't ping from one network through the router to the other network and to the Internet. I have no firewall setup.
* How can I change the TCP port number for telnet or http services, if I do not want to use the ports 23 and 80, respectively?
* When I use the IP address/mask in the form 10.1.1.17/24 for my filtering or queuing rules, they do not work.
* I need to set up DHCP client, but there is no menu '/ip dhcp-client'.
* Can I statically bind IP's to MAC addresses via DHCP?
* How can I masquerade two different subnets using two different external IP addresses for them?
* I cannot surf some sites when I use PPPoE.
8. Bandwidth Management Related Questions
* Can I use MikroTik as a bridge and a traffic shaper in one machine?
* Can I limit bandwidth based on MAC addresses?
9. Wireless Questions
* Can I bridge wlan interface operating in the station mode?
>>>Download Here<<<
1. About MikroTik RouterOS™
* What is MikroTik RouterOS?
* Can I test the RouterOS befor i buy it?
* Where can I buy the License Key?
* Can MikroTik connect to high speed service provider such as T1, T3 or other high speed connection?
* How fast is Microtik RouterOS?
* Can Mikrotik RouterOS do what Cisco router can?
* What Operating system is used to run Mikrotik RouterOS?
* Is RouterOS secure?
2. Logging on and Passwords
* What is the default username and password for RouterOS login?
* I forgot my password?
* After power failure the MikroTik router is not starting up again?
* How can I access router if LAN has been disabled?
3. Licensing Issues
* How many time can I use RouterOS licence?
* Does the license expire?
* How can I reinstall the MikroTik RouterOS™ software without losing my software license?
* Can I use my MikroTik RouterOS™ software license on a different hardware?
* What to do, if my hard drive with MikroTik RouterOS™ dies, and I have to install another one?
* How can I enter a new Software Key?
* I have mis-typed the software ID when I purchased the Software Key. How can I fix this?
4. Installation
* How large HDD can I use for the MikroTik RouterOS™?
* Can I run MikroTik RouterOS™ from any hard drive in my system?
* Why the CD installation stops at some point and does not go to the end?
5. Upgrading
* How can I install additional feature packages?
* How can I upgrade?
* I installed additional feature package, but the relevant interface does not show up under the /interface print list.
* If I do upgrade RouterOS, will I lose my configuration?
* How much free disk space do I need when upgrading to higher version?
6. Downgrading
* How can I downgrade the MikroTik RouterOS™ installation to an older version?
7. TCP/IP Related Questions
* I have two Network Interface Cards in the MikroTik router and they are working properly. I can ping both networks from the router but can't ping from one network through the router to the other network and to the Internet. I have no firewall setup.
* How can I change the TCP port number for telnet or http services, if I do not want to use the ports 23 and 80, respectively?
* When I use the IP address/mask in the form 10.1.1.17/24 for my filtering or queuing rules, they do not work.
* I need to set up DHCP client, but there is no menu '/ip dhcp-client'.
* Can I statically bind IP's to MAC addresses via DHCP?
* How can I masquerade two different subnets using two different external IP addresses for them?
* I cannot surf some sites when I use PPPoE.
8. Bandwidth Management Related Questions
* Can I use MikroTik as a bridge and a traffic shaper in one machine?
* Can I limit bandwidth based on MAC addresses?
9. Wireless Questions
* Can I bridge wlan interface operating in the station mode?
>>>Download Here<<<
Subscribe to:
Posts (Atom)


