Tuesday, June 23, 2009

Mikrotik Issue

Issue No. 17, 22-Apr-2009

  • Wake on LAN
  • Logging to file
  • Two new RouterBOARD products
  • new Support request form

Issue No. 16, 16-Mar-2009

  • Tiktube HD torrents
  • Biggest MUM ever
  • MikroTik Certified Integrator program (MCI)
  • Opportunity for Trainers

Issue No. 15, 9-Feb-2009

  • a new product
  • a very useful wireless feature against deauthentication attack
  • 800 mum users!
  • update speeds up RB1000 10x !


Issue No. 14, 10-Dec-2008

  • R5H wireless
  • metaROUTER
  • RouterOS v4 beta
  • MUM Europe 2009

Issue No. 13, 15-Oct-2008

  • RouterBOARD 411 price drop!
  • RouterBOARD 493AH
  • MUM Brazil 2008
  • Tiktube.com returns
  • Introducing HWMP+
  • Long awaited feauture Store

Issue No. 12, 30-Sep-2008

  • Introducing Virtualization
  • MUM Brazil 2008\
  • RB1000 performance chart

Issue No. 11, 29-Jul-2008

  • 2 new products
  • MPLS
  • RouterBOARD performance
  • product clearance
  • OSPF v3 and IPv6

Mikrotik Version 3.25 Released

What's new in 3.25:

*) fixed problems with files under MetaROUTERs;
*) made WinBox work better on smaller screens;
*) made WinBox to not bring down BGP & OSPF when BGP window was opened;
*) WinBox menu is better organized, all sub-menus are sorted;
*) fixed WinBox problem - /128 IPv6 addresses could not be entered
where network address was expected;
*) added l2mtu interface parameter with ability to configure for
interfaces that support it;
*) RB1xx ether1 did not work properly in switch mode;
*) api - do not accept truncated property names;
*) api - closed sessions were not removed from the '/user active' list;
*) routing, routing-test - fixed a BGP crash;
*) routing-test - deleted routes were sometimes left displayed in Winbox;
*) routing-test - fixed BGP interoperability issue with old Ciscos;
*) routing-test - added remove-private-as BGP peer config option;
*) added few more variables to hotspot html pages:
bytes-total, bytes-total-nice, packets-total
*) bandwidth-test supports testing over multiple tcp connections (default 20);
*) graphing - HTML page refresh-interval configurable in console;
*) user manager - IP pool added to user batch-add form;

Saturday, June 13, 2009

How To Become Mikrotik Training Partner

To become a Training partner, send an e-mail to training[at]mikrotik.com if you would like to become a MikroTik Training Partner.

Please let them know what course do you plan to deliver, how is the training class going to be organized, class setup, how many days, what equipment is going to be provided, what is going to be included into the curriculum, who is going to be the trainer, what is his/her previous experience teaching IT in general and data networking particularly. MikroTik is offering Train-the-Trainer classes for those who want to become MikroTik Trainers.

Install Mikrotik on VMware

1. Download mikrotik iso

choose new virtual machine

choose typical

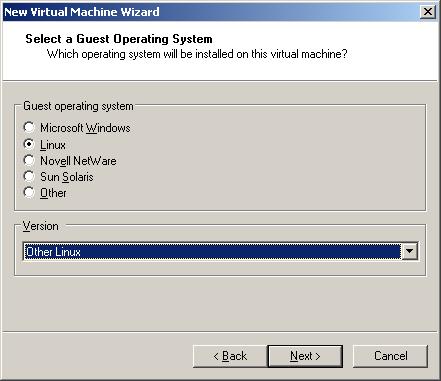
choose operation system linux cause mikrotik duplication from linux for version choose other linux.

give name and place virtual machine

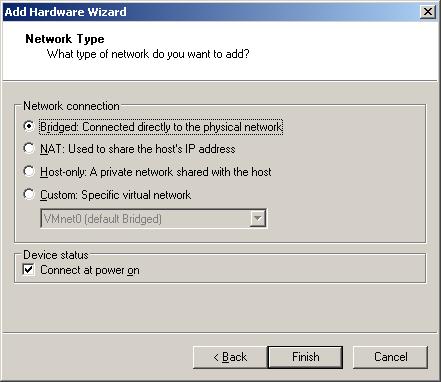
For network connection choose bridge networking.

Disk capacity for installation vmware.

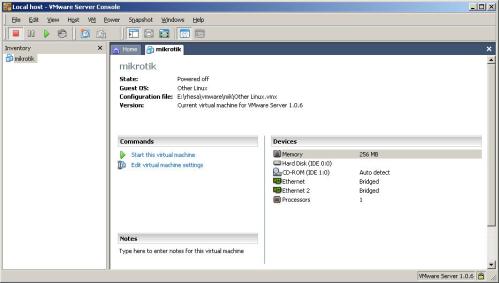
If everything is finished vmware look like this.
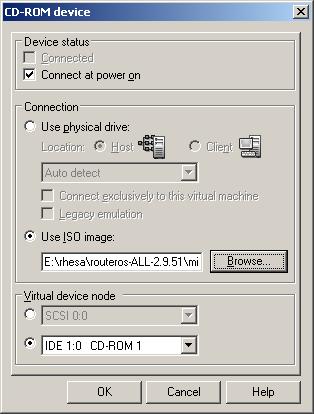
But we can make cd rom using file ISO mikrotik has been downloaded, and for our hardisk we can remove and we can add and choose IDE type.

this picture remove harddisk, now we can try for add again.

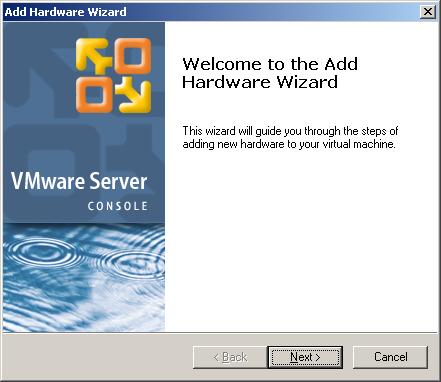
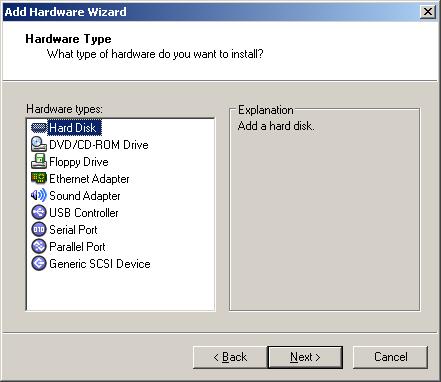
We can choose add Harddisk.

Choose create new virtual disk.

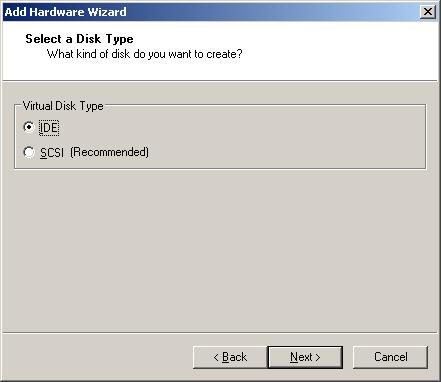
For disk type choose IDE.

Make file name for our disk.
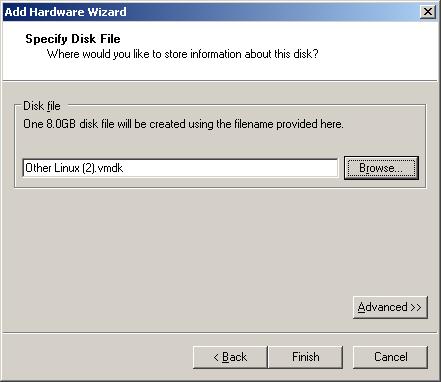
Waiting process.

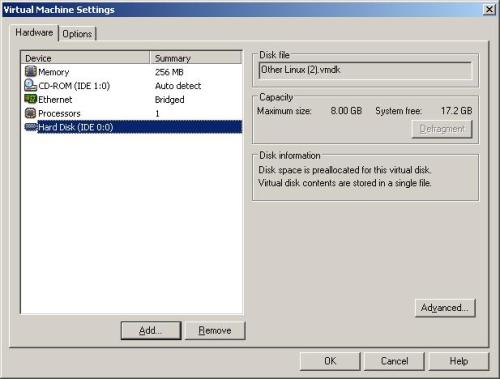
Like this picture harddisk is changed IDE type.

if we want using router we must add hardware ethernet adapters.

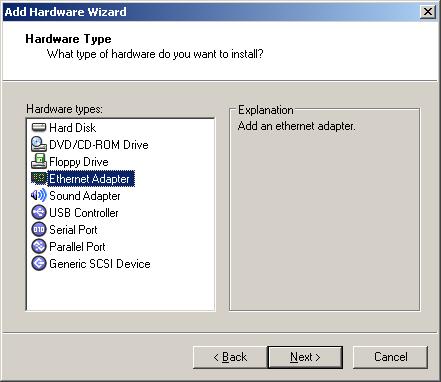
We choose bridge networking.

until this result picture.

Once again we dont forget, we must setting cd rom for using file ISO if we has downloaded.

If everything finished we can running mikrotik with play or start

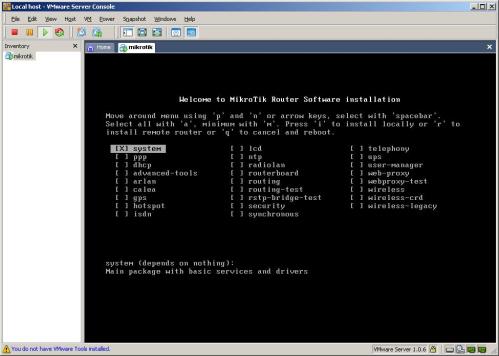
This applications will install choose ‘a’ or all the mean for choose all applications.

For doing installation choose ‘i’ or install , waiting for 15 minute, your instalasi will be finished and take a reboot.

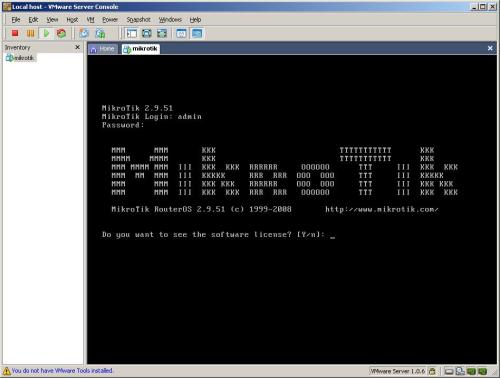
After reboot you can login
login : admin
password :

password empty and choose ‘Y’ for reading licensi and ‘q’ for quit from license.

Traaataaa….

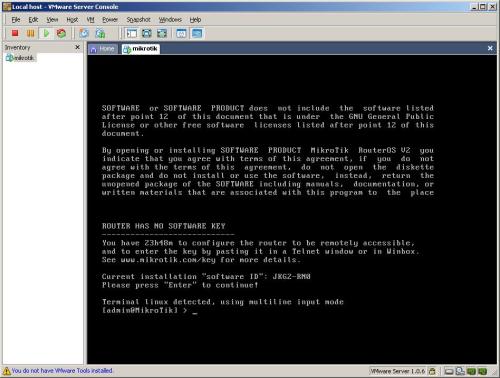
Installation finished and we can using mikrotik.

You can download complete tutorial (e-book) with . doc format at here

source : esjeruk.org

Video Tutorial Mikrotik on Virtual Machine

Run mikrotik OS on virtual machine?

Hi i want to know how can i run mikrotik routeros on a virtual machine? Can anybody take me through the steps? I download VMware but got stuck there. what must i do next? I have a mikrotik ros iso file.

Mikrotik can runing well on virtual Machine/PC with operating system Windows, Linux, or Mac.
These video tutorial contain how to setup Mikrotik OS on Ubuntu with virtual machine:

Tutorial :http://www.tiktube.com/?video=94

RouterOS built-in RADIUS client configuration

This Ebook provides Tutorial about RouterOS built-in RADIUS client configuration, supported RADIUS attributes and recommendations on RADIUS server selection.

RADIUS, short for Remote Authentication Dial-In User Service, is a remote server that provides authentication and accounting facilities to various network apliances. RADIUS authentication and accounting gives the ISP or network administrator ability to manage PPP user access and accounting from one server throughout a large network. The MikroTik RouterOS has a RADIUS client which can authenticate for HotSpot, PPP, PPPoE, PPTP, L2TP and ISDN connections. The attributes received from RADIUS server override the ones set in the default profile, but if some parameters are not received they are taken from the respective default profile.
The RADIUS server database is consulted only if no matching user acces record is found in router's local database.
Traffic is accounted locally with MikroTik Traffic Flow and Cisco IP pairs and snapshot image can be gathered using Syslog utilities. If RADIUS accounting is enabled, accounting information is also sent to the RADIUS server default for that service.

For completed Ebook (format .doc)
Download here

Mikrotik as Hotspot and RADIUS Server

Mikrotik, to setting hotspot could be very easily, just repeated click in steps until finished. But how with the case where users more than one (the example of the student that brought laptop to the campus plus the guest, friend etc) that the wish continue to be able to connected in the network but continue to be able to in monitored who that login with the maintenance as easily as possible.

Mikrotik membuat setting hotspot bisa dilakukan dengan mudah, cukup klik sana sini selesai. Tapi bagaimana dengan kasus dimana usernya banyak (misal mahasiswa yang bawa laptop ke kampus plus tamu plus bla..bla) yang maunya tetap bisa terkoneksi di jaringan tapi tetap bisa di pantau siapa yang login dengan pemeliharaan semudah mungkin.

Jawabnya / answered:

Tambah dukungan authentifikasi dengan radius di hotspotnya /Add authentifikasi with the radius in hotspot.

Caranya juga mudah, step by stepnya :

1. Login to mikrotik (with winbox, putty etc).

2. Click Radius menu like the following image:

3. Click "+" button

4. Isikan data-data yang sesuai, minimal di bagian/input form with the name as follow :

Service -> pilih hotspot

Address -> input ip address server radius

Secret -> input ‘password’ to connect Radius Server

Authetification Port -> default 1812

Accounting Port -> default 1813

Click Apply

5. Muncul bagian service.

6. Click menu

Ip -> Hotspot -> Active

Untuk melihat user yang sedang menggunakan hotspot.
To look active user that using hotspot

User will login with username and password that given by that worksheet.


source: http://alamsyah.rasyid.net

Friday, June 12, 2009

Hardware Reset Mikrotik

Hardware Reset Mikrotik

Hardware Reset Password Mikrotik

RouterOS password can only be reset by reinstalling the router, or using the reset jumper (or jumper hole) in case the hardware is RouterBOARD. For RouterBOARDS just close the jumper and boot the board until the configuration is cleared. For some RouterBOARDs there is not a jumper, but a jumper hole - just put a metal object into the hole, and boot the board.

Password RouterOS hanya dapat diubah/ direset degnen cara menginstall ulang router, atau menggunakan reset jumper (lubang jumper untuk reset) pada perangkat keras/hardware RouterBOARD. Pada RouterBOARDS tinggal menghubungkan jumper tersebut dan booting ulang agar konfigurasi kembali default. Untuk beberapa RouterBOARDs tidak ada pin jumper khusus, namun berbentuk lubang sehingga bisa ditempatkan benda logam/seperti kawat ke dalam lubang dan menghubungkan keduanya.


Image:Resethole.jpg

The below image shows the location of the Reset Jumper on older RouterBOARDs like RB133C:

Gambar dibawah menunjukkan lokasi Reset Jumper pada RouterBOARD versi lama seperti RB133C

Image:CRW 5184.jpg

Note: Don't forget to remove the jumper after configuration has been reset, or it will be reset every time you reboot.

Catatan: jangan lupa melepas jumper setelah konfigurasi direset ke default, karena kalau masih terpasang, akan mereset configurasi secara terus menerus ketika booting.

Translated from http://wiki.mikrotik.com